Table of Contents
UPDATED: January 2018
Hootsuite (Aff) rocked the social media world recently when their latest integration was announced: Instagram. There had been ways to add some Instagram functionality to your Hootsuite dashboard previously, but for me they only worked sporadically, and the main feature we all wanted was missing. Hootsuite listened. Now we have a simple way to schedule Instagram posts through Hootsuite.
Connect Hootsuite to Instagram
The first step is to add your Instagram account to your Hootsuite dashboard. Click on your picture, or the grey owl, in the very top left corner of your dashboard window. This brings you to a listing of all the teams, organizations and social networks you have access to through your account. Click on the “Add New Social Network” button and follow the instructions. You will need to know your Instagram password!!
NOTE: If this is a shared Instagram account, only one person will be able to add it to their Hootsuite dashboard, the same as for all other social networks. If you need to have more than one Hootsuite account have access to the Instagram account, you will need to have a Pro Hootsuite account with team members.
Now that you’ve connected your Hootsuite and Instagram accounts, you should be able to choose Instagram from the drop-down menu where you dictate to which network you will send your update.
Install and Set Up Hootsuite App
In order for all this to work, you must have the Hootsuite app installed on a mobile device that you will be carrying with you when the post needs to be published. Instagram does not yet allow for programs like Hootsuite to auto-publish your content. To be completely within the terms of service of Instagram, you must click the final publish button manually. However, Hootsuite is still a big help in streamlining this process because you can set up your publishing schedule in advance and Hootsuite will simply remind you to tap a few buttons at the right time.
Once the app is installed on your device, you must allow push notifications for the Instagram account. This allows Hootsuite to ring and buzz your phone, and send you a notification that there is content waiting to be published. If you miss the ringing/buzzing, the next time you check your notifications it will be there waiting for you.
Design Your Post
Unfortunately, there are no design or editing features built into the Hootsuite dashboard. You will need to pre-design your photos graphics before uploading to Hootsuite for scheduling. If you simply upload a photo, Hootsuite will auto-crop your image square in the middle…you get no choice in how it is cropped. You can edit your photo once you’re pushed through to Instagram, but this can be time consuming at the wrong time.
There are myriad apps out there to help you filter, crop and edit your photos to perfection. Use them first. Save your photo. Now log in to Hootsuite.
Schedule Instagram Post
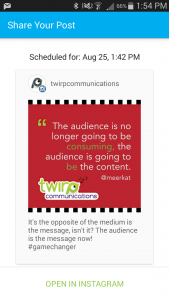
Scheduling your post is as easy as choosing the Instagram account from the drop-down menu, adding your description and choosing a time to post.
NOTE: Choose your hashtags wisely. You don’t want to overfill the description with hashtags, especially if you are cross-posting to Twitter or Facebook.
Accept the Push Notification
If you have an Instagram Business account, you will no longer have to go through the final step of accepting the push notification at the scheduled time! Personal Instagram accounts, however, still have to accept this final manual push, copying and pasting the description in before it’s posted.
You can read more about the new Hootsuite Instagram integration on the Hootsuite Official Blog.


Great tutorial. I’m wondering what your thoughts on Mass Planner, it is like hootsuite but it’s a desktop software.
I’m not familiar with Mass Planner, but I love the ease of a cloud-based system that is automatically synced, no matter which device I’m using.
Hi, Anita!) and I like one more tool that allows scheduling photos on instagram by PC . http://www.push.photo Use it 4 months and all works well))
Thanks Linda, I’ve not heard of that one before but will have a look!